Whilt
Woh
- Joined
- Apr 26, 2016
- Messages
- 4,748
- Nebulae
- 10,910
Hello. Recently CloudFlare released their own, free DNS. You can read more about it here. https://1.1.1.1/
What is a DNS?:
A DNS is what your computer and broadband use to connect users to websites based of easier to access domain names, rather than IP addresses. By increasing their speed, you may experience faster load times during your searches.
Why should I bother changing my DNS?:
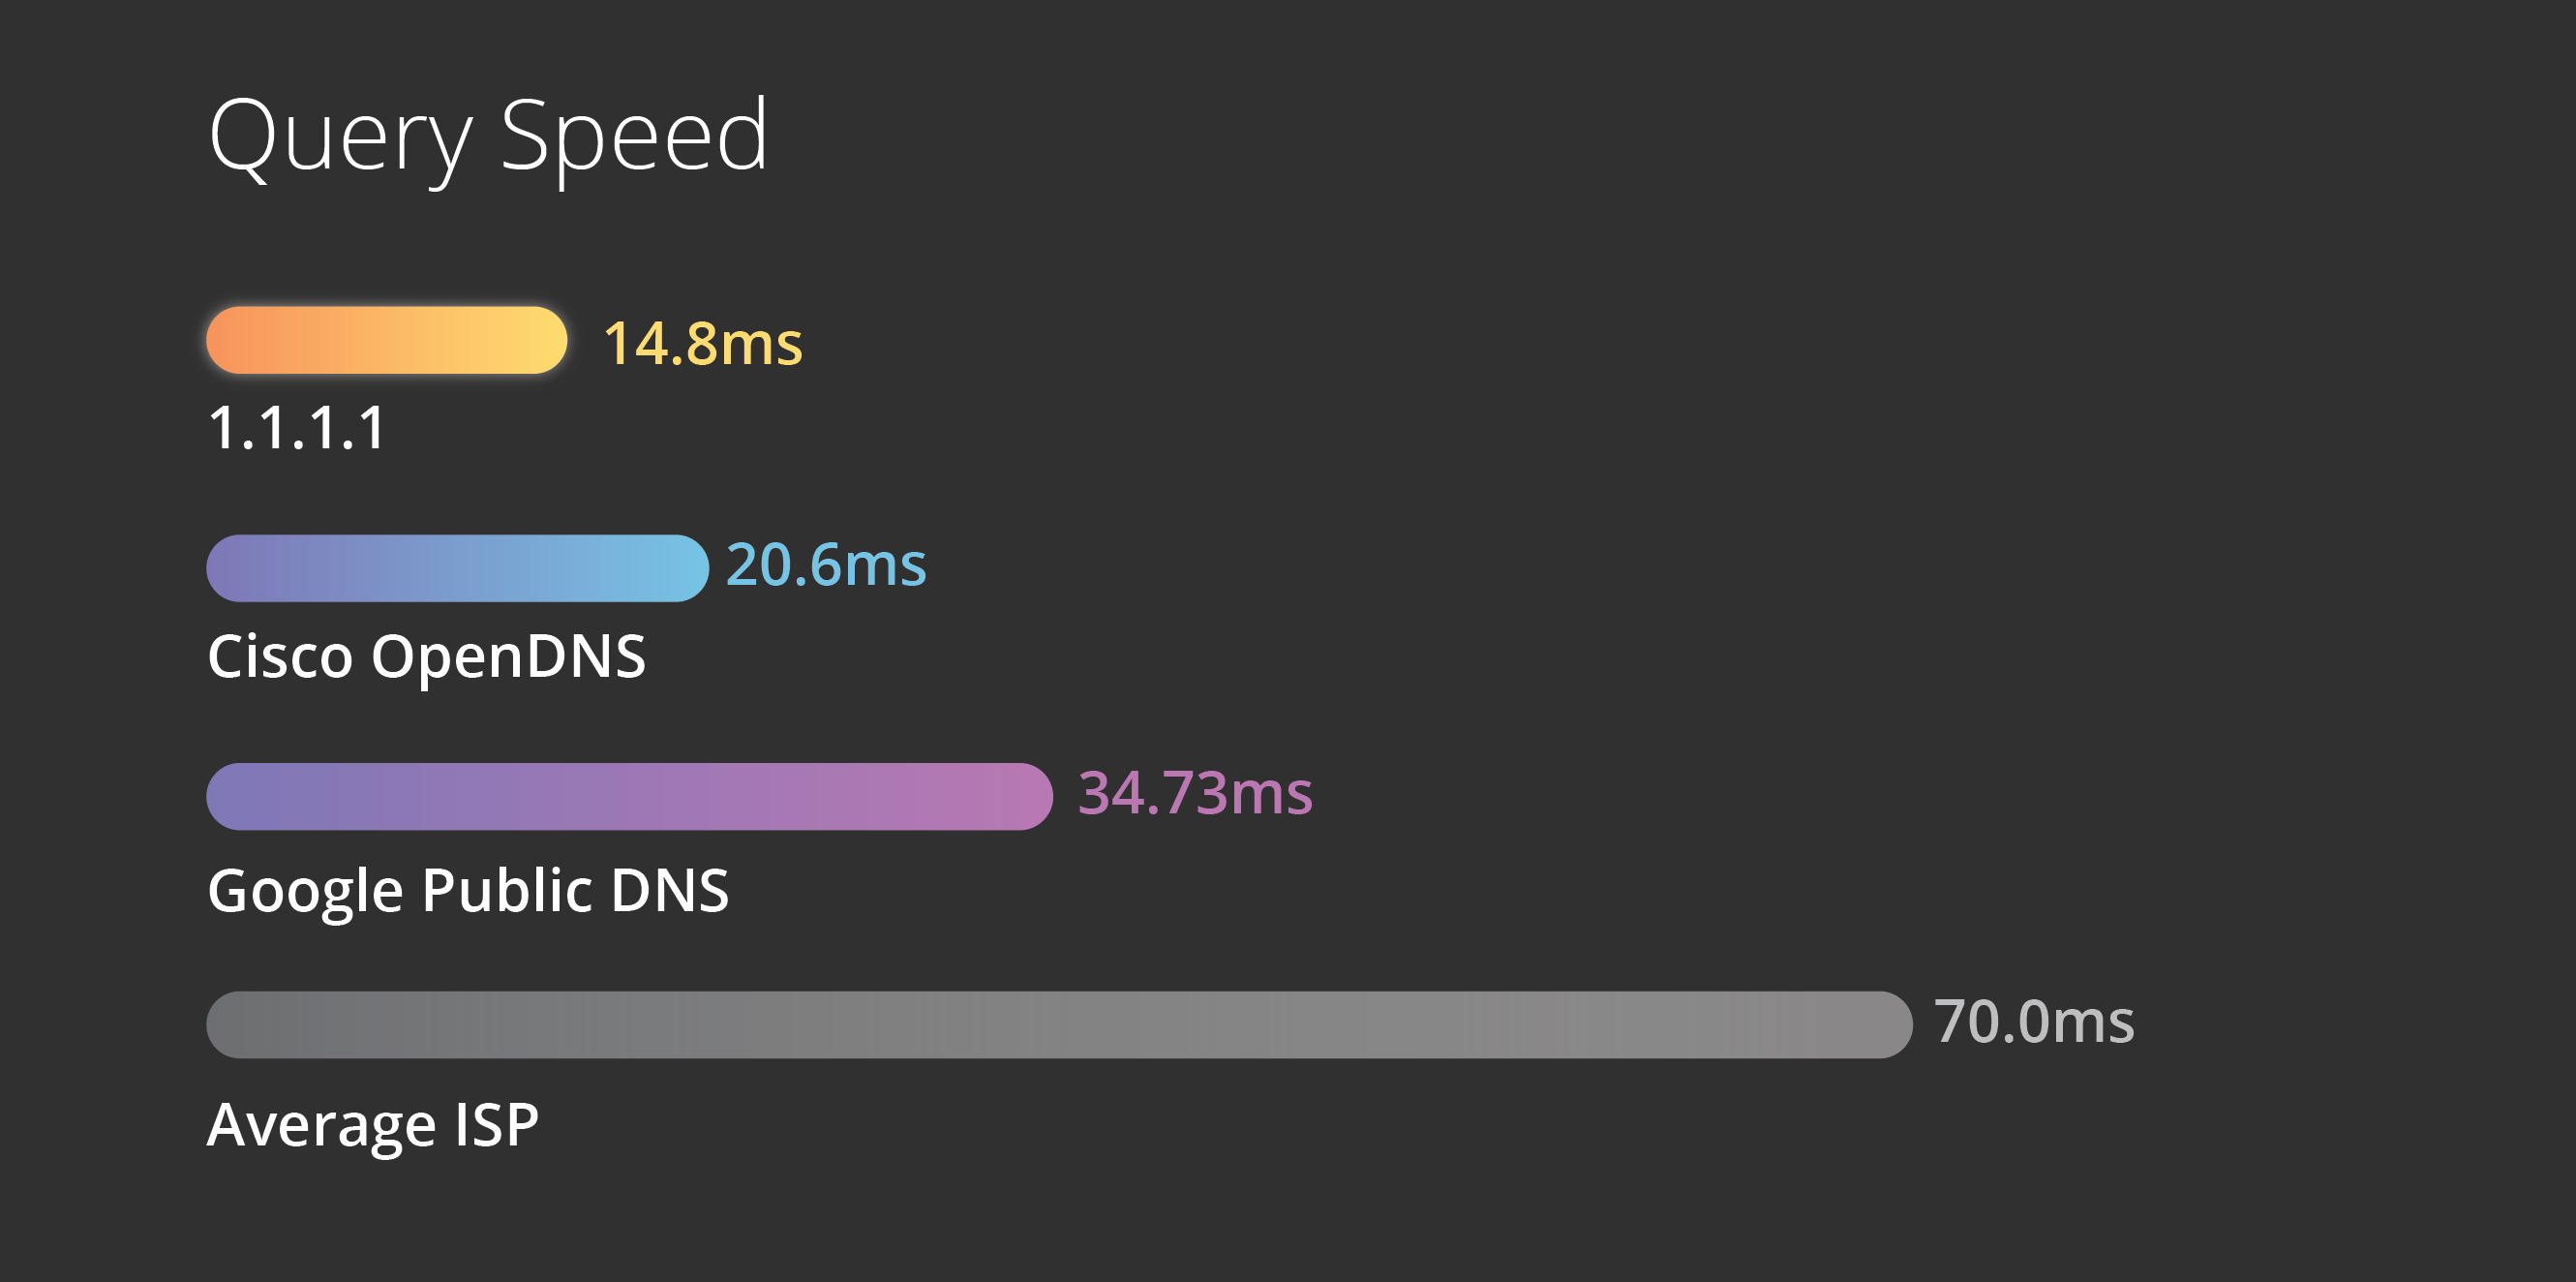
The response time of the DNS provided to you by your ISP is usually of subpar quality and has a poor response time:

How can I set up a DNS?
What is a DNS?:
A DNS is what your computer and broadband use to connect users to websites based of easier to access domain names, rather than IP addresses. By increasing their speed, you may experience faster load times during your searches.
Why should I bother changing my DNS?:
The response time of the DNS provided to you by your ISP is usually of subpar quality and has a poor response time:

How can I set up a DNS?
- Click on the Start menu, then click on Control Panel.
- Click on Network and Internet.
- Click on Change Adapter Settings.
- Right click on the Wi-Fi network you are connected to, then click Properties.
- Select Internet Protocol Version 4 (or Version 6 if desired).
- Click Properties.
- Write down any existing DNS server entries for future reference.
- Click Use The Following DNS Server Addresses.
- Replace those addresses with the 1.1.1.1 DNS addresses:
- For IPv4: 1.1.1.1 and 1.0.0.1
- For IPv6: 2606:4700:4700::1111 and 2606:4700:4700::1001
- Click OK, then Close.
- Restart your browser.
- Open System Preferences.
- Search for DNS Servers and select it from the dropdown.
- Click the + button to add a DNS Server and enter 1.1.1.1
- Click + again and enter 1.0.0.1 (This is for redundancy.)
- Click + again and enter 2606:4700:4700::1111 (This is for redundancy.)
- Click + again and enter 2606:4700:4700::1001 (This is for redundancy.)
- Click Ok, then click Apply.
- From your iPhone’s home screen, open the Settings app.
- Tap Wi-Fi, then tap your preferred network in the list.
- Tap Configure DNS, then tap Manual.
- If there are any existing entries, tap the - button, and Deletenext to each one.
- Tap the + Add Server button, then type 1.1.1.1
- Tap the + Add Server button again, then type 1.0.0.1. This is for redundancy.
- Tap the + Add Server button again, then type 2606:4700:4700::1111. This is for redundancy.
- Tap the + Add Server button again, then type 2606:4700:4700::1001. This is for redundancy.
- Tap the Save button on the top right.
- Connect to your preferred wireless network.
- Enter your router’s gateway IP address in your browser.
- If prompted, fill in your username and password. This information may be labeled on the router.
- In your router’s configuration page, locate the DNS serversettings.
- Write down any existing DNS server entries for future reference.
- Replace those addresses with the 1.1.1.1 DNS addresses:
- For IPv4: 1.1.1.1 and 1.0.0.1
- For IPv6: 2606:4700:4700::1111 and 2606:4700:4700::1001
